 The best landscape considers the architectural style of your house and integrates that look and ambience into the front-yard design. A perfect landscape is really about balance and harmony. For example, never plant clipped and manicured hedges alongside freely growing patches of wildflowers because one will look out of place in this clash of opposites. This set of landscaping tips then basically exhorts homeowners keep landscaping elements in harmony with each other, using considerations of size, shape, color, texture, or other characteristics. It’s the perfect landscape that considers the view of and from the house, shade, balance, and harmony with other plants when mapping out where to plant trees. Which particular area of the landscaped yard to place or plant the trees is important. You can do no wrong by doing a map that specifies where to plant trees in your yard. Keep the landscape design unified and relatively simple by using only enough variety to sustain bloom and add visual interest throughout the season. This way you avoid the trap of planting one of everything. Design your front yard landscape based simply on what the neighbors are doing or what the nearest home improvement store offers. Most of all, determine how you and your family will use your front yard, what will bring you the most enjoyment, and make deliberate strides toward creating a beautiful yard that you will enjoy for years to come. Modern landscapes are known for having a clean, minimalist look with no clutter. In contrast to the naturalistic, wavy borders popular in many landscapes, this style emphasizes straight lines and geometric forms which better reflect and relate to the architecture. Along these lines, you can choose pale colors for your modern landscape, which exude honesty and simplicity. By using neutral, naturally-colored materials like ipe wood, limestone, weathered steel, concrete and pea gravel, you allow the sleek lines of the architecture and the landscaping to shine. You may also choose plants with a distinct form. Japanese boxwood is a favorite because it can be clipped and manipulated into shapes, but spiky plants, soft-textured weeping plants, and anything with a strong visual punch can create the right effect when used skillfully. And see that one type of plant or one color takes center stage in your landscape design. That goes well with the simplicity theme. This theme goes out the window if you pick hot new color trends for any permanent element in the landscape. Landscape architects note that using a trendy color on tile or other long-lasting features is a quick route to a dated landscape. Other things to avoid if you want a modern landscape include organic mulch in your garden beds. This is because the neutral color of pea gravel creates a contrast between the foliage and the ground, showcasing the minimal use of plant material. You may also be tempted to use organic shapes in your pathways, borders or materials. This is unwise since naturalistic curves do little to enhance the relationship of the landscape with the architecture. Even when choosing natural materials like stone, cut them into elongated rectangles or create a geometric pattern so they relate to the home and take on a contemporary look.
0 Comments
 Every homeowner desires a landscape perfect in form and function. A perfect landscape is a feast to both your own eyes and those of other beholders. But such an ideal landscaping project is easier said than done, especially when you have to build one from scratch. What landscape design is ideal for your particular type of neighborhood and home lot? Which varieties of trees and shrubs require less attention? What is the best layout of the plant beds?
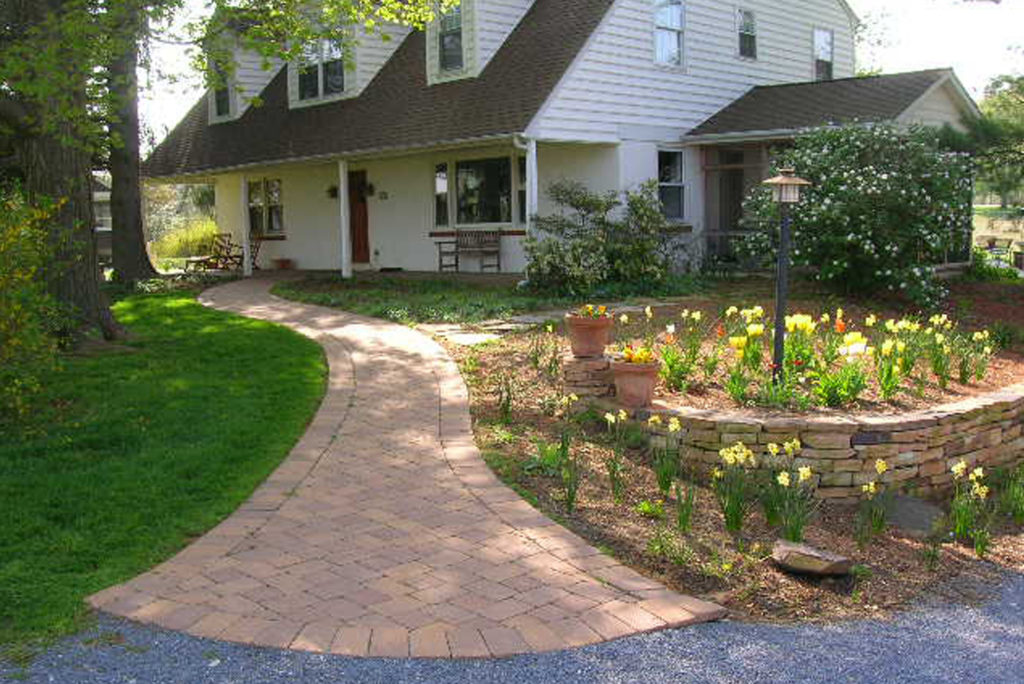
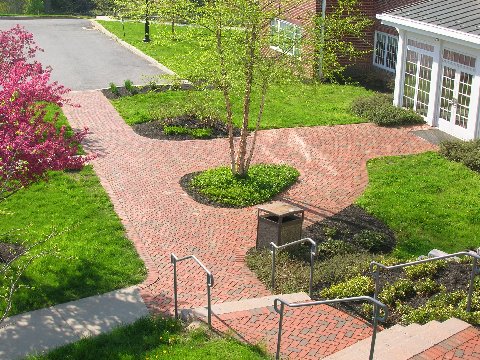
Here are some of the important things to consider in landscaping. A compilation of the dos and don’ts can help you put up a landscaped yard that you can be proud and happy about for years and years to come. The Dos start with planning. You need to have a plan to save on cost and effort on redesigning the landscape every now and then which becomes necessary when, say, a tree planted haphazardly obstructs the view from your window or the paving material on the walkway is washed out by the rains. A key element of the plan is selecting the plants for your landscape. Make up your mind where to spend your money. Buying the smaller size of fast growing plants lets you spend more on larger, slower growing plants. Remember that plants, especially trees, grow tall and will crowd your house, obscure views from windows, and invite home maintenance problems like wood rot and insects later on. The idea is to plan for low maintenance. Think of how your landscape will appear from the curb outside. With the increasing popularity of outdoor living space, the backyard is getting a lot of attention lately but it’s the front yard everyone sees. So money spent on curb appeal is a good investment. This means that you have to stay ahead of the weeds. Letting weeds go to seed spells trouble in any garden. Take a little time each week to pull weeds that have popped up because it will pay off in the long term. In the planning stage, take a cue from the surrounding area for plant selection and then follow natural access patterns throughout your landscaping. Make pathways at least 36” (1 meter) wide and use interesting textural and/or colorful elements for walkways, not plain stretches of concrete. The DON’TS start with the need to avoid wandering, pointless curves in walkways. Don’t plant hedges or other plants too close to walkways. Doing so infringes on the comfortable space required when swinging arms, carrying packages, or other regular activities when walking up a path. Two feet of space is a good rule of thumb. For the plants, don’t think in singles. A single plant can easily get lost in the garden. Think in multiples, preferably odd numbers. Creating swaths of color increases visual impact and reduces maintenance. Don’t force a focal feature such as a large flower bed or water feature where it doesn’t belong and looks out-of-place. Instead, let the layout of the land guide you. Finally, don’t make visitors guess where to walk or which door to come to but rather, make the entrance to your home clear and inviting. There is no limit to the design of deck landings homeowners can build to beautify their front yard. It all depends on your imagination, your local building codes and the purpose for which you intend to use the residential deck landing. A great option is a deck landing with a permeable walkway. If your deck is low to the ground, you have many design options for its stairs. Because low decks require only one or two steps, building codes may not require railings or landings. You may decide to set the stairs at an angle at a corner of the deck using wide steps to give the deck a contemporary look. To heighten this effect, incorporate several angles for the same set of stairs or add an additional set of stairs off another corner of the deck.  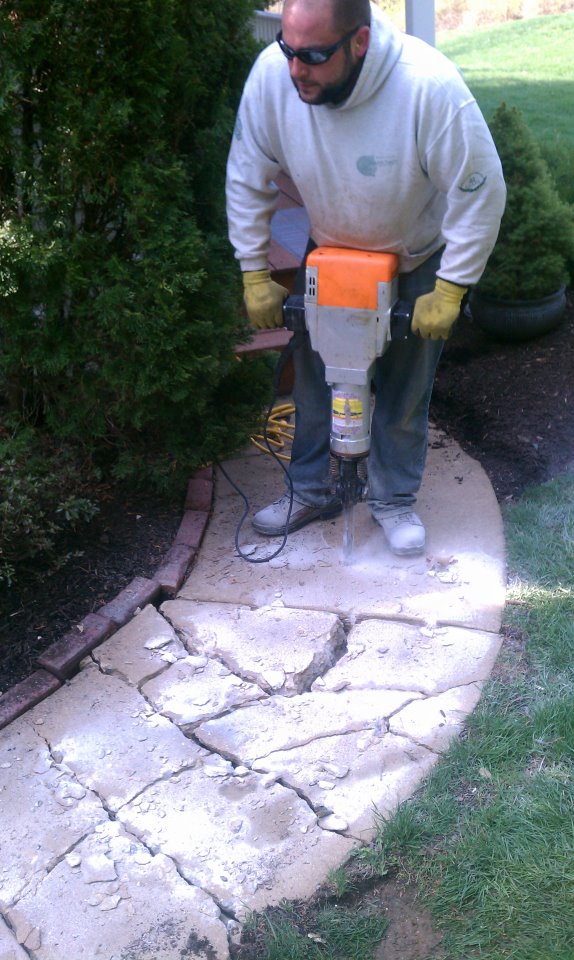 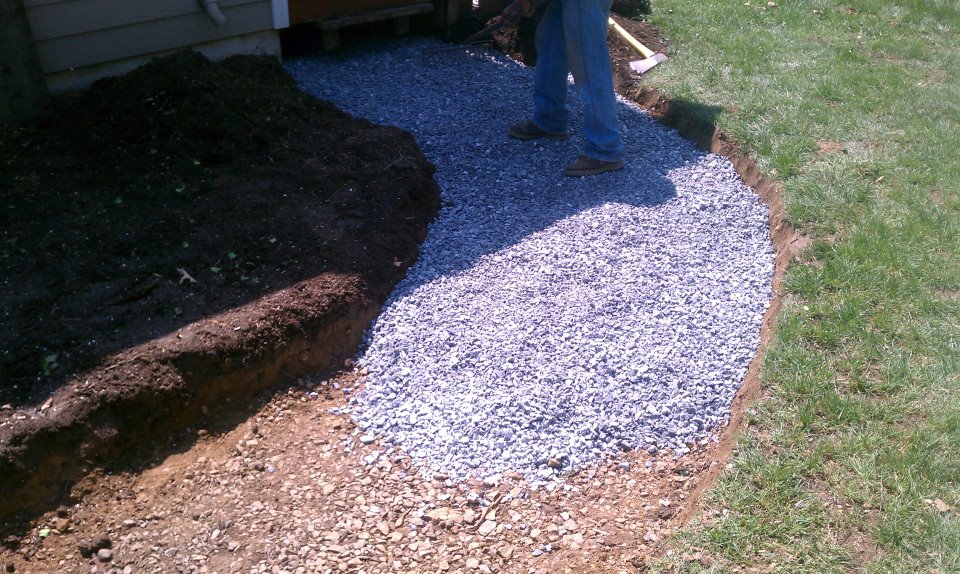 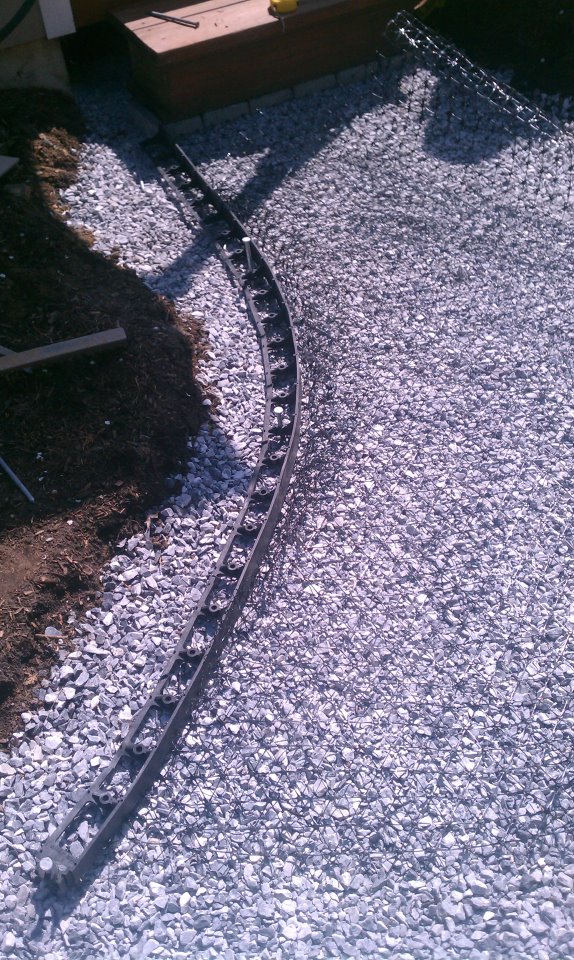 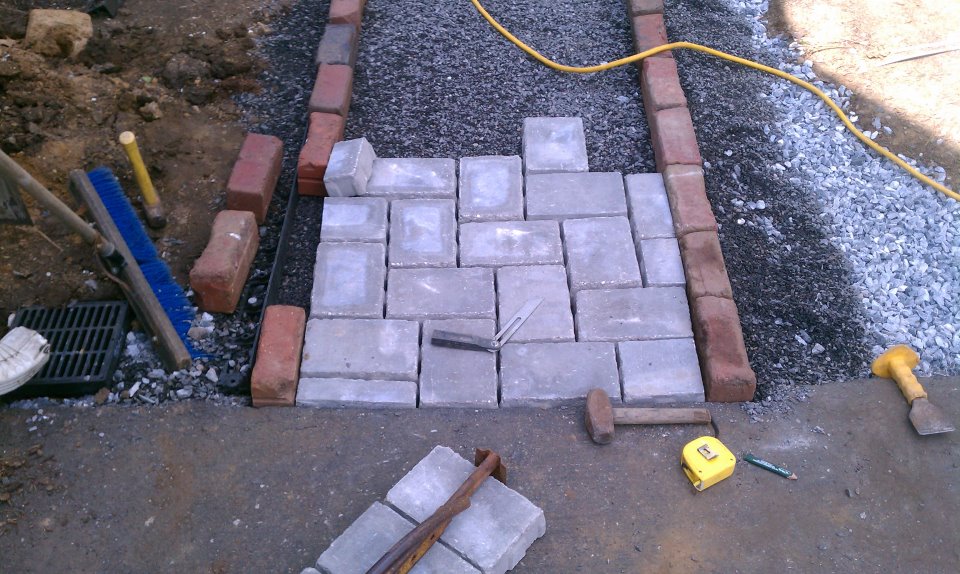 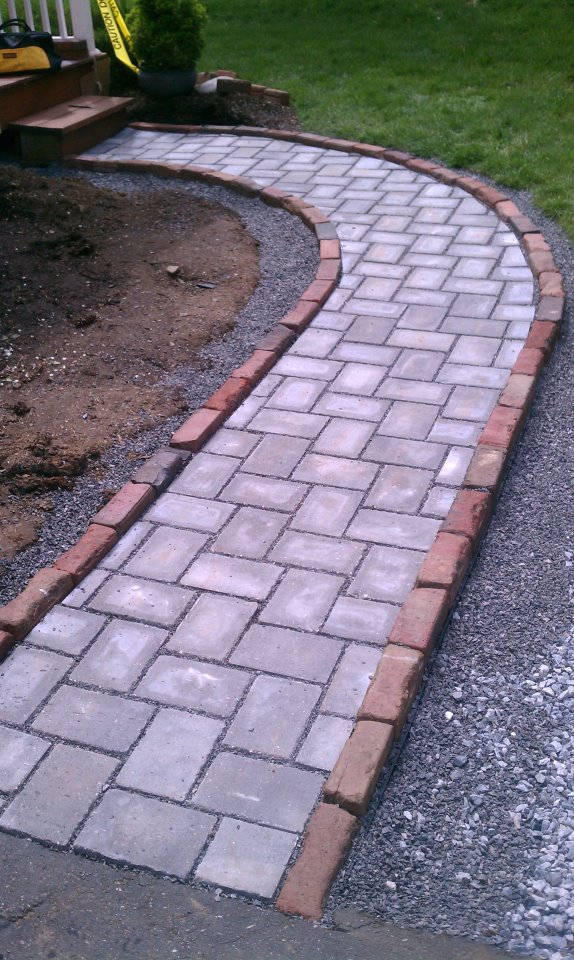 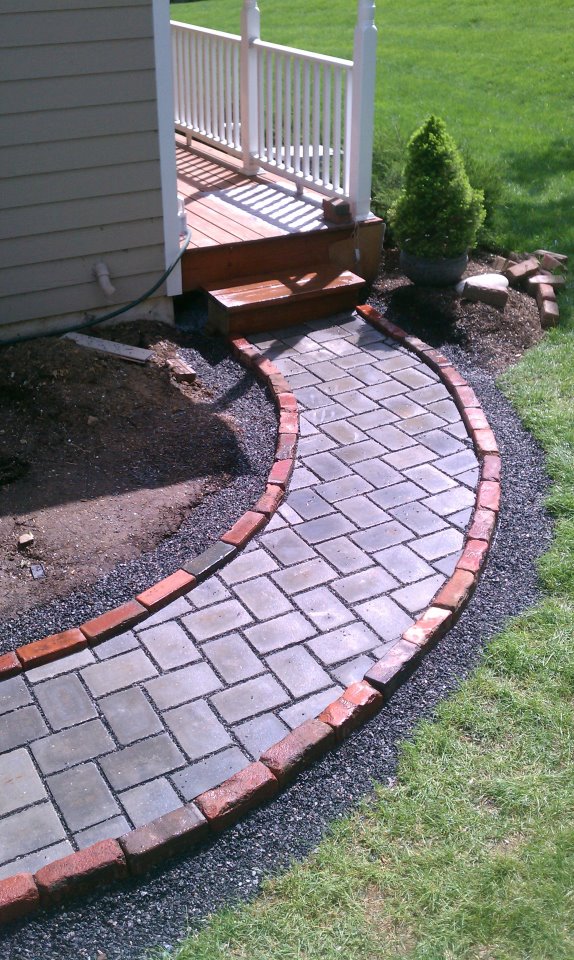 If the deck is high above the ground, railings and landings will be required according to building codes. One design idea is to use a landing to mark a change in the direction of the bottom portion of the stairs. If you use this design option, ensure the bottom portion of the staircase is not under the deck for safety. Another design idea is to create a wide walkway with permeable pavers. Permeable walkways may be built using different building materials but these must be sustainable and allow water to flow through their surface. While other non-porous materials direct water to storm-drains, these surfaces help ground water recharge by allowing water to flow into open spaces between the materials. These porous materials also filter pollutants and solids from the water as it percolates through the surface. Permeable paving is becoming more popular among home and business owners in the past couple of years due to the innovative methods to save water. This paving option doesn’t just look good; it’s beneficial to our environment. Consider permeable paving in large walkways or driveways and make sure that a 6-inch gravel bed is immediately below the porous material. From the top down there are four layers to permeable paving. Each of these different layers acts as a filtration system to clean storm water. The least expensive permeable paving material is crushed stone. Typically either decomposed granite or gravel can be loosely packed on top of leveled soil. Rainwater will easily be able to pass between the small pieces of stone. This is good for walkways and possibly driveways. Ground reinforcement grids are also now available for installing permeable paving. These reinforcement grids are a mesh that assists you while installing to plant or fill in spaces in between the material, giving the paving a structure. Likewise ideal are plastic mats with cells, which are usually in the shape of circular or hexagonal cells that allow for planting or porous material between the cells. Grass pavers are another form of permeable paving. A walkway made of grass pavers will closely resemble a lawn. Open cells within the pavers are filled with dirt and then planted with grass seed. These pavers are especially suited for residential driveways because they are designed to carry heavy loads. 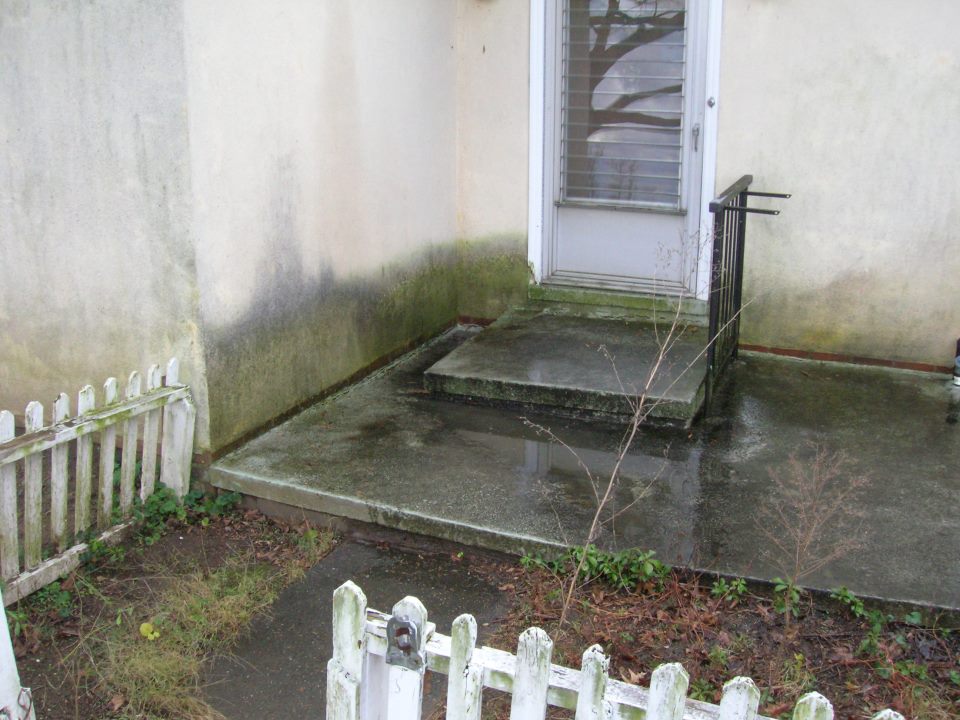 Before 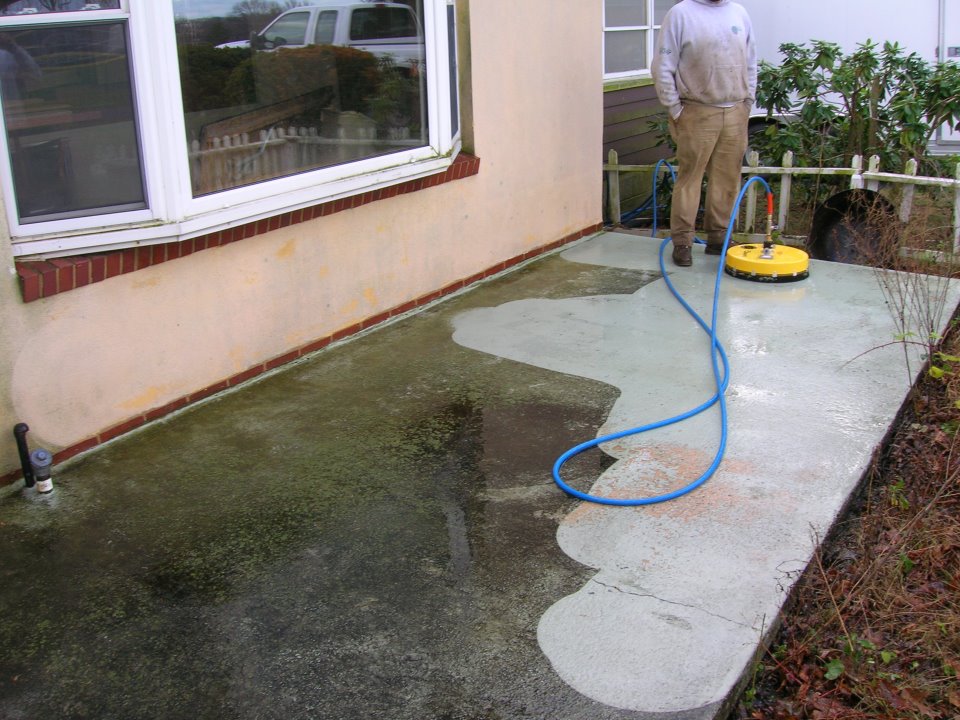 After After three or four years, your once beautiful landscape project will inevitably turn into an eyesore and a liability. There’s no escaping this problem. Perhaps the pavers on the walkway become uneven or the gaps between the pavers grow wider and unsightly. Worse, your entire patio may now be leaning towards your home causing rainwater to slowly erode its foundation. This happens to every home with a landscape attraction out front even if the landscape work was done by a good contractor. Blame it on the elements and the wear and tear brought by time as a matter of course. So it behooves upon the homeowner to look for landscaping repair and restoration. In case the landscape contractors you originally got made a shoddy job, the imperative is for you to find a team that can repair the mistakes done on your yard. The team you need is one that can move in quickly to properly level pavers, support retaining walls, rebuild features, and everything else to make a landscape look good again. Such landscape repair and restoration undertaking must include proper base preparation and compaction, the adding of edge restraints, joint sanding and many other services that may be needed to make your landscape or hardscape stand up to the test of time. See that the landscape repair team is very passionate about the quality of service it offers to homeowners and it shows in their workmanship. A landscape repair and restoration effort has to cover the paver patio, walkway, driveway and any outdoor living space that had gone seedy with time. The landscape contractor needs to make the pavers or walls level and closed the gaps in the pavers where unwanted weeds have begun to grow. Most of all, the contractor will replace the patio, walkway or driveway that is now sloping back towards your house, forcing water to your walls and foundation. In re-leveling your pavers or walls, see that the contractor makes sure that everything is up to industry standards as set by the Interlocking Concrete Pavement Institute for pavers and National Concrete Masonry Association for your walls and steps. This includes proper base preparation and compaction, to edge restraints, joint sands, and more. There are possible bonuses such giving clients a long-lasting, maintenance-free paver patio, walkway, or driveway that they can enjoy and be proud of. When the landscaping repair and restoration job is done, the common procedure is for the contractor to give you a warranty on their workmanship for at least three years. That’s for your assurance that the contractor did not pull a fast one on you, which sometimes happens in this business. The best contractor is one that offers paver cleaning and sealing for those hardscapes in need. Typical applications for this service are areas where there are grills, and driveways where grease and oils are dropping on the pavers. Some people really enjoy the look of pavers when they are wet. Some contractors also provide such extra as cleaning and sealing your pavers with a wet look application that does just that. 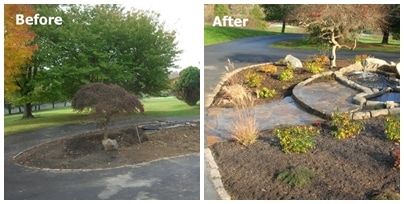 In terms of design and care of water gardens, grading and drainage are key considerations. You just can’t install a water garden in your landscaped yard without a proper grading and drainage system. This is because inefficient or inadequate draining can result in all kinds of hazards that can cost you in the long run. If outdoor spaces are not designed with drainage in mind, un-drained water can cause a variety of problems in your yard. For example, standing water can compromise the structural integrity of the foundation of your home and any other outdoor structures. It can also jeopardize the health of your plants if their roots become water-logged. This is a particular concern for water-sensitive plants. Poor drainage management can potentially cause other serious dangers such as mosquito infestation and inconveniences such as soggy lawns and unsightly, muddy swamps. It is therefore important that you take these potential challenges seriously. A good idea is to contract an expert in landscape design that is usually armed with a variety of tools to expertly implement water drainage solutions into your landscape. Rather than viewing these potential threats as limitations, look at water drainage considerations as an opportunity to plan your property in a way that is both exciting and efficient. With efficient grading and drainage, your water garden is prepared to take sudden and large volumes of water in a way that doesn’t diminish, but rather enhances the overall look of your landscape. The most straightforward way to achieve good drainage is to carefully grade the terrain of your yard, creating artificial pitch throughout the terrain to ensure that gravity keeps water flowing away in all sections of your property. Swales, which are artificial troughs, are another tool employed in this effort. They are effective, and look totally natural if designed correctly. Swales can also add an interesting and fun character to a flat yard with limited natural contour. If this method is not particularly practical for your property, another option is to tastefully integrate catch basins and drain tiles that effectively manage water without detracting from the aesthetic quality of your outdoor space. Drain tiles are particularly effective in low corners prone to quick flooding. There is a variety of product styles that can provide the drainage support your property needs in a way that blends into the natural look of your yard. For example, an artfully concealed downspout drain tiles may be used. This helps provide effective water management in a way that avoids the use of unseemly pipes. The grading and drainage experts may also recommend French drains, which are subterranean pipes that collect water and direct it to a runoff depository. This is a very high-end way to implement drainage infrastructure. One popular option available with French drains is the construction of a swale disguised as a rocky river bed. Using high quality boulders with varied color, these charming structures can meander through your landscape, creating a rugged and bold appearance. The options, as you can see, are nearly endless. Be sure though that the landscape experts that you come to are used to dealing with a variety of drainage issues; so that they drain your garden water instead of your wallet. 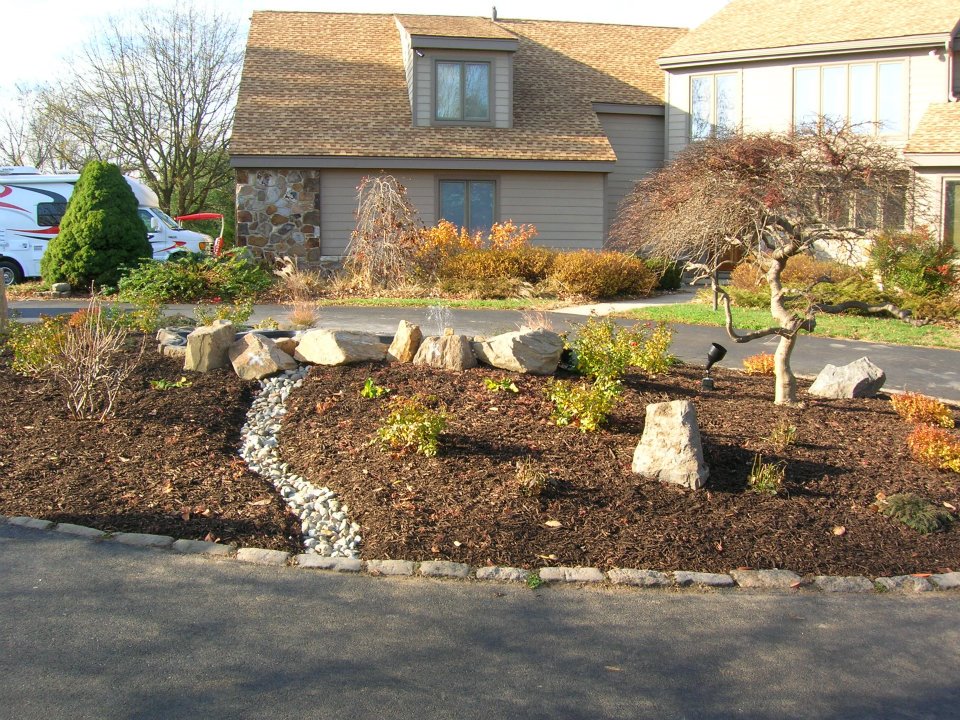 There is no homeowner that won’t desire a landscaped front or backyard. A landscaped lawn is desirable in both economic and aesthetic sense. It does not only increase the value of a residential property but also lifts one’s soul that nature and a green surrounding provide as a matter of course. That said, a homeowner without a landscaped front who now wants to build one has a good number of options in going about it. If you’ve never gone through a landscape design before, chances are you’ll be surprised by all the choices available for beginners in this area. The same principles that guided your room setup inside the house may be used to guide your designs out front. Here are some great landscaping ideas for beginners. First, draw a list of your particular needs and wants. Do your kids need a play space? Do you want to grow vegetables? Does your family often gather on a patio? Then do some very rough sketches of the yard with thoughts of where you want to place a thing; which is a great organizing principle for landscape design for beginners. You can easily play around with ideas without a lot of time and commitment.” Next, study the sun and wind patterns. You might want to place a patio on the west side of the house, but this will get lots of afternoon sun, which means that dinnertime in August won’t be relaxing at all. And wind whistling around a corner will quickly extinguish a fire pit. Those are common mistakes in landscape design for beginners. Your design should take into account what the sun and wind do at different times of the day and year. Live with this idea for a while before carrying it out. Rushing out things can sometimes lead to choices that you’ll regret later on. For example, a fire pit for family barbecue may be erected on an area where the smoke gets into a window of the neighbor’s house. Creating a landscape is really about slowly developing a plan and enjoying the process. From your master plan, start with a small flowerbed. Go out and work on it for an hour or two when you have the time, and worry less about filing everything up right away. Give yourself some time to see how things develop. Plants grow and things fill in, and people forget that. The point is to take time and do it in pieces so you are happy with the final results. If you get into this thing and want to get it done, you’ll likely to take shortcuts and be too sloppy. Work around a focal point. Any good garden design has a focal point or series of focal points, and it’s an easy principle to put in place in landscape design for beginners. It could be a sculpture or a stunning plant, a tree, or a series of shrubs. The basic principle in landscape design is the scale and pacing that will give your yard a pulled-together look. There will be variations in size, shape, and color, with tall plants against a building or in the back of a flowerbed, and paths that lead people through the space. So be open to change. 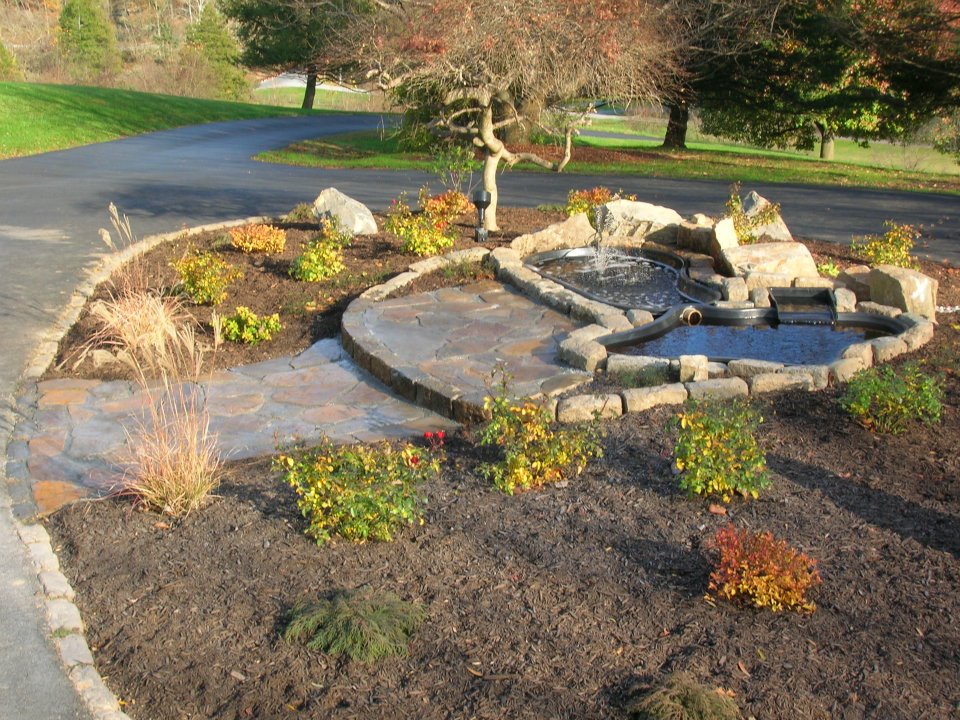 Winter can be rough on your homes, especially your hardscape which is perpetually exposed to the elements. When the last signs of cold weather melt away, you can find yourself heading into spring with pitted driveways, cracked asphalt and crumbling landscaping. So it’s important to make repairs before summer heats up and puts further stress on these important areas. Doing your own hardscape repairs isn’t difficult. You’ll save money, and doing it yourself gives you the opportunity to get some outdoor exercise this spring. You may need professionals to pour new asphalt but repairing existing asphalt in your hardscape can be done by yourself. For pothole repairs, start by sweeping and removing any loose materials from the area needing repair. Next, pour ready-mix asphalt in the trouble spot and spread evenly to a depth of no more than 2 inches at a time. Use the back side of a shovel to compact the material. And since there is no oily tracking with this material, just drive over it a few times with your vehicle. The compaction causes the product to cure into an effective patch. For deeper potholes, keep repeating in 2 inch amounts until completely filled. Patio pavers and bricks can shift, sink or raise, and even crack during a tough winter. If your hardscape has a sand underlay, fixing problems is relatively easy. For broken or cracked pavers, simply remove the damaged pieces, check that the sand is level, and fill the gap with a new paver or brick. If your patio has become uneven over time, you’ll need to lift all the uneven pavers, level the sand beneath – you may have to add sand – and then put the pavers back atop the now-level sand. Concrete is a common hardscape material around homes across the country. Concrete driveways, walkways and steps can all succumb to cracking, crumbling, chipping and spalling after a harsh winter. Fortunately, concrete is an easy material to fix, and patching a problem while it’s small may help prevent a much costlier repair or even replacement down the road. To repair cracks of virtually any size, simply apply an easy-to-use product. Power wash cracks to remove debris. For larger fissures, it may be necessary to use a hammer and chisel to remove crumbling concrete and produce a clean, clearly delineated repair site. For resurfacing old, damaged or spalled concrete, Flo-Coat resurfacing material by Sakrete provides an easy alternative to costly replacement. Simply remove loose materials from the surface, mix the material, dampen the concrete surface with water and pour the resurfacing material onto the concrete slab. Use a long-handled squeegee to spread the mixture evenly. Be sure to protect expansion and control joints with tape to prevent filling. Whether your brick, stone or cinderblock retaining wall is acting as a retaining wall or simply a decorative one, moisture is not its friend. If your region has had a lot of snow this past winter, check your landscaping walls for damage such as cracks in mortar, shifted stones or crumbling bricks. Repairing cracked mortar is easy as long as the bricks or stones it secures remain in good position. A few simple repairs will help ensure your home’s hardscape is in good shape, and ready for whatever summer weather brings. 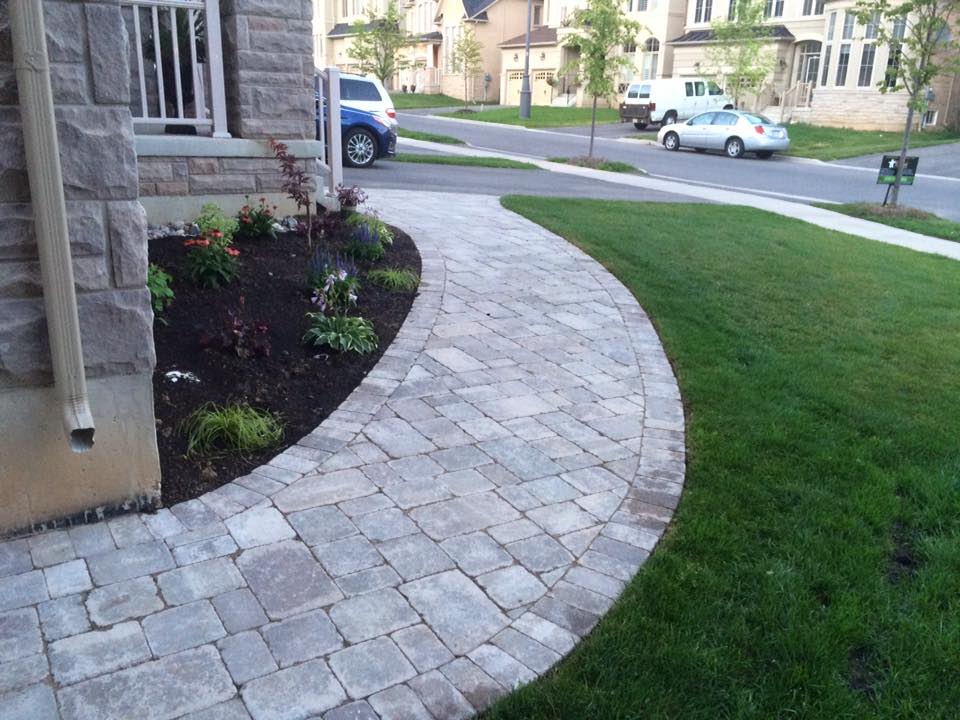 Is your walk patio or outdoor living spaces are in need of repair or maintenance and you’re stumped about what to do? Relax, it can be relatively easy. Those with experience in walk patio repair will tell you all you need is to start with an old fashion inspection of the problem. It could be a sunken patio base or a chipped piece of concrete or deteriorating mortar. Whatever the case, repairs will come easy once you look closely into the problem. The reason is that assessing the basic issues leads to solutions. Here are five ways that can be easily worked with walk patio repairs. The first thing you need to do is look very closely at your existing mortar joints. Look at the color of the sand. Believe it or not, not all sand looks the same. Sand is simply a collection of very small rock particles, and the color of individual sand particles can be vastly different if the particles come from a variety of black, red, white and gray rocks. Visit different building supply businesses and/or sand and gravel pits, and try to find sand that matches both in color and particle size. The second thing is to make a very rich mixture that will be exceedingly strong. Once you have the correct sand, mix it one part of it to one part of pure Portland cement. You need this strength, even though you do not get too many extremely cold days. The extra cement also helps make the mortar flow easily from the tip of the special grout bag you will use to fill the defective mortar joints. Mortar grout bags are just like icing bags used by professional cake decorators. They are larger than an icing bag, and have a metal cone tip that has a one-half-inch hole at the end. The third thing is do not work on a hot, sunny windy day. Experts recommend working on cloudy days. The mortar will dry too rapidly, especially where you are filling slight depressions in the existing mortar joints. Once you have the mortar mixed, lightly spritz the mortar joints you are going to fill. Do not get them too wet, just slightly damp. Fill the grout bag half way with the mortar mix, and apply slight pressure to make the mortar mix flow just as toothpaste oozes from its tube. If you can’t get the mortar to flow, you need to add more cement and/or slightly more water. The mortar mix needs to be fairly wet so that it doesn’t clog the grout bag tip. Fourth thing is to check out the different colored pieces of sand. Each grain is a small piece of solid rock. The sand for the repair job should match the existing sand as close as possible in grain size, shape and color. Carefully guide the grout bag tip so that you apply new mortar only to the joint. Move the bag along and make sure you apply mortar so it rises above the level of the brick by about one-quarter inch. Fifth and the most important thing is to take the proper steps to ensure the sealing process is done correctly otherwise the seal will not be as strong and will eventually fail. In terms of keeping your patio durable and long lasting, sealing is best. Before patio sealing can begin the first step is to clean the patio surface of all dirt and debris as well as any other stains or paints. Using a power washer is generally the best way to do much of the removal work however the surface must be completely dry before the patio sealing can begin. Once the initial sealing has begun, the best conditions are during mild temperatures where no rain is expected. 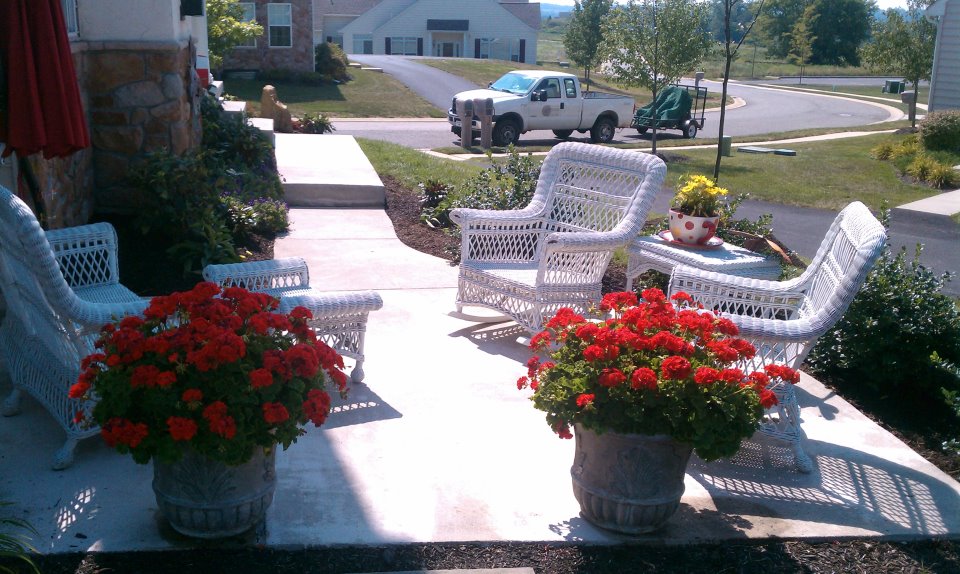 A well-designed patio makes for a beautiful home. It’s the first home feature that greets first-time quests and so they draw the conclusion that you keep an ideal home if you have a well-designed outdoor area. For yourself and family, a great patio design or an outdoor living spaces are also provides as a great place for relaxing, outdoor entertaining, or simply enjoying the beauty of nature.
There is a perfectly suited for every home, lifestyle, and budget. Patios can be designed in every shape, color, size, and material imaginable. Before you start laying down the first pavers or pouring concrete, you should consider the options available from professionals doing this kind of work. Today’s patios are more versatile and offer a wide range of options in design. First, you will need to formulate a plan of action. Brainstorm and pinpoint what sort of outdoor space would best suit your lifestyle. Banish the notion that this are to be strictly on an outdoor space. Canopies, awnings, pergolas and umbrellas can be added for shade. Additionally, patios can offer up a variety of options for entertaining, dining, and seating. The addition of patio ideas such as an outdoor kitchen, a fire pit, built-in seating, and planters should be considered before construction begins. When planning a patio design project, you are faced with a barrage of outdoor living spaces ideas and choices in designs. From the options in materials, patio decor, furniture, and various choices in its design, there are many ways to customize your outdoor living space. Modern paved outdoor areas are made with the use of a vast variety of materials such as stone, cement, wood, slate, sandstone, brick or granite. The possibilities are seemingly endless when considering the options for constructing your patio or space for outdoor living. Every project begins by building a solid base. This first step is crucial and if mishandled may lead to a space that does not last more than a year. The base of these may either be constructed with gravel, sand, or concrete. But no matter what kind of material you use, the base should be from six to eight inches deep. Concrete can be used as a flooring material for the patio, and can be surprisingly versatile. Concrete, can be painted, shaped, and formed into patterns. Alternatively, interlocking stone can be used as a base. Stones have become an appealing option in recent years, and can help to properly drain rainwater away from the home. The sturdy wood pergola can also be used. Pergola shaded to perfection has just the right amount of fiery charm. The concrete slabs form a minimalist backdrop to the sleek lines of the modern outdoor furnishings. The monochromatic furnishings and planters are contrasted by bright and fiery pops of red. The cherry stain on the pergola perfectly echoes the fiery theme. Though this area is brimming with masculine elements, the result is that of a charming and elegant retreat. A good design is a patio that reflects all the best elements present in modern design. There are clean lines and a modern use of concrete embellishments form the foundation for this modern seating area. The bold use of modern materials is subdued by the refreshing additions of water and the lovely verdant hues present in the garden. When designing your perfect patio, remember that sometimes unlikely mixes make the best matches. Interlocking stones in a garden add beauty and function to the landscaping project. This is why interlocking is a very popular and attractive choice not only for garden but also for other landscaping projects such as including driveways, patios, stairs and entryways, pathways and walkways. There is a wide variety of interlocking stone products available on the market which allows a lot of design flexibility for your unique landscaping project. 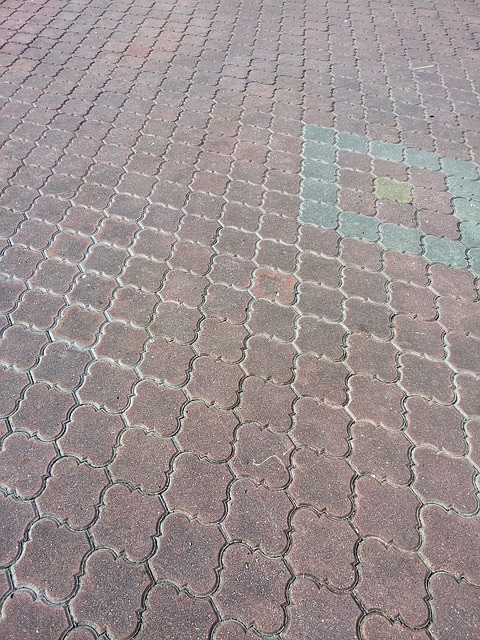 Interlocking pavers have been used for centuries, dating back to ancient Roman roads. Their durability and aesthetically pleasing characteristics is what makes them a popular choice among homeowners today. These can be treated as a system, each may be put in place to keep the others intact. These are not just visually attractive but they are also beneficial to our environment. The reason is that they are usually permeable, which means water percolates through the surface and recharges our groundwater tables. Unlike traditional concrete that is one consistent slab, they have edges between each one and are filled with a porous material like sand. Interlocking pavers are excellent in large driveways and walkways. They definitely add appeal and value to your home. But before installing them in your landscaping project, you need to understand the whole process. To get the job done the right way, your project needs a compacted sub base, a geo-textile fabric, a layer of sand, edge restraint, pavers, and joint filling material. The measurements of each layer changes with each project having individual circumstances; for example if you have problems with drainage they will be addressed in the thickness of the layers. Installing these can be a big project depending on the areas size; it is recommended that you call a pro in your area to get the job done correctly the first time. For interlocking pavers, there is a large variety of designs and colors you can choose from. And once in place, they are easy to repair, durable and beneficial in many ways. They can withstand heavy weights and harsh weather conditions and do not develop cracks like traditional concrete. Best of all, hey add value to your home. The pros definitely outweigh the cons when considering this. They are one of the best paving options out there and are guaranteed to add major curb appeal to your home. Homeowners usually choose it for their numerous colors and design options. Pavers come in a variation of colors ranging from black, tan, green and nearly every other natural tone. Some projects are laid using one color of it, while others utilize multiple colors throughout creating an intriguing design. More detailed and intricate designs will all affect the final cost. Consider your edge restraint for the borders of your design; the most popular choices are a poured in place concrete curb or a staked plastic edging. Be sure you know what you are doing if you decide to do this project yourself, if installed improperly may have to be replaced in a matter of months. |
Ross Causey
Ross, the President of Garden Square Landscaping, Inc., has enjoyed the design and build aspects of a landscape construction company here in Southern Chester County for 20 years. A member of the Kennett Square Lions Club, Ross gives back to the community. Ross attended the University of Delaware and is a member and certified installer of ICPI and NCMA. In addition to this as a certified instructor for both organizations he has the opportunity to instruct contractors, manufacturers, and distributors across the United States. Ross lives and works in Kennett Square with his wife and 2 children. Archives
June 2017
Categories
All
|
 RSS Feed
